

deposit, withdrawal) is enabled on your account — see Overview.
Unlike a buy or a sell, an on-chain transfer isn’t settled the moment the user confirms it: it’s final once the network confirms it. Your backend gets a transaction_result at that point, not before.
Deposit
A single screen, Deposit crypto, where the user gets an address to send funds to.1
Asset and network
The user picks the asset and then one of its networks. The list only includes the assets and networks your account accepts deposits for.
2
Address
The widget shows the user’s deposit address for that asset and network, with a QR code and a copy button. When the network uses a memo (or tag), it’s shown next to the address, with its own copy button and a warning that a deposit sent without it may be lost.The widget always reminds the user to send only that asset, on that network: a transfer of another asset, or on another network, may be lost.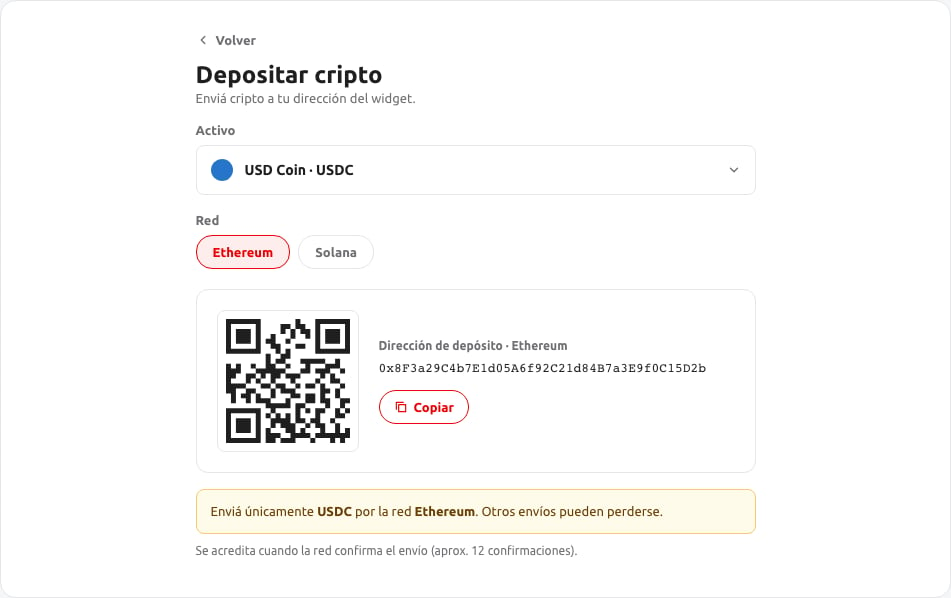
3
Credit
The deposit is credited once the network confirms the transfer and Ripio completes its checks. Until then, it appears in the user’s Activity as Pending.
transaction_result, whether or not the user had the widget open when the funds arrived.
Send
The user sends crypto from their balance to a wallet outside your platform.1
Transfer details
On Send crypto, the user picks one of the assets they hold and a network, and enters: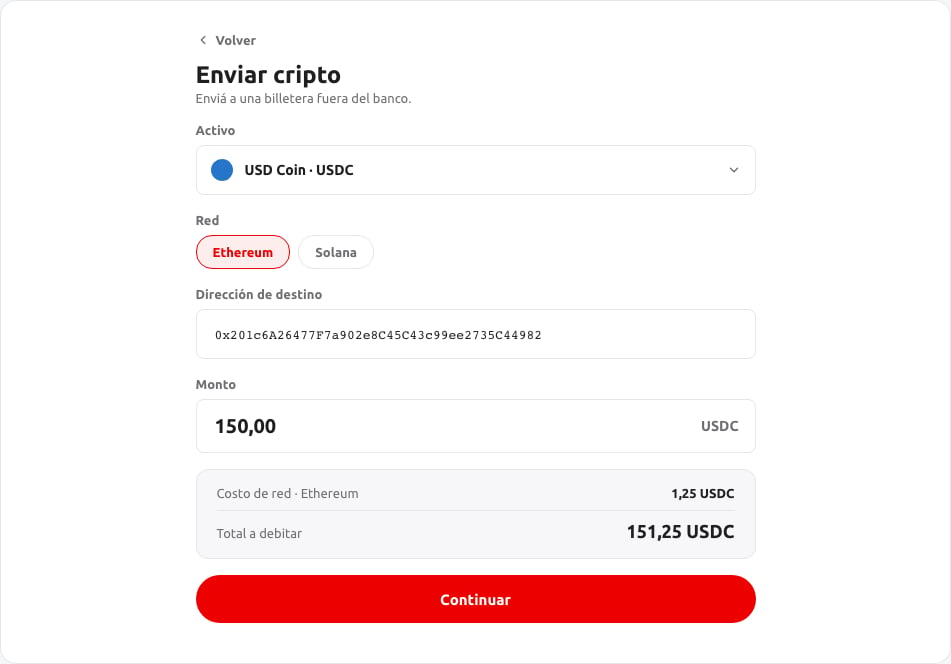
- The destination address, validated for that network as they type. The widget doesn’t let them continue until the address is confirmed valid.
- A memo, when the network uses one.
- The amount the recipient receives.
2
Review
Review the transfer summarizes the amount, address, network, memo, fee and total, with a reminder that on-chain transfers can’t be reversed. If the fee expires before the user confirms, the widget gets a new one and asks them to review the total again.
3
Transfer started
Confirming submits the transfer. The widget shows it as started and pending: it stays Pending in Activity until the network confirms it.
When the transfer can’t be submitted
If Ripio rejects the transfer before creating it, the user sees why and nothing is debited: insufficient balance (including the fee), an amount below the minimum or above the maximum, an invalid address or memo, a network that isn’t available, or a fee that expired. They can review the transfer and try again. A transfer that requires recipient details (travel rule) can’t be sent from the widget. If the submission fails without a clear outcome — a timeout or a network error — the widget tells the user it couldn’t confirm the transfer and offers to retry. The retry is safe: it resumes the same transfer, so the user is never charged twice.What your backend receives
Both flows end with atransaction_result once the transfer is final — op_type DEPOSIT or WITHDRAWAL — so you can update your own record of the user’s balance:
- Deposit: sent when the deposit is credited. A deposit the user sent but that isn’t confirmed yet doesn’t produce a result.
- Send: sent when the withdrawal is confirmed on-chain (
COMPLETED) or fails after being submitted (CANCELLED). The success screen the user sees is not the result: the withdrawal is still pending at that point.
Deposit and withdrawal results are enabled per account. Ask your Ripio contact to turn them on.