

1
Amount
The user toggles between Buy and Sell, picks an asset, and enters an amount — either typed or from a preset chip. A reference rate is shown, but it isn’t guaranteed until the next step.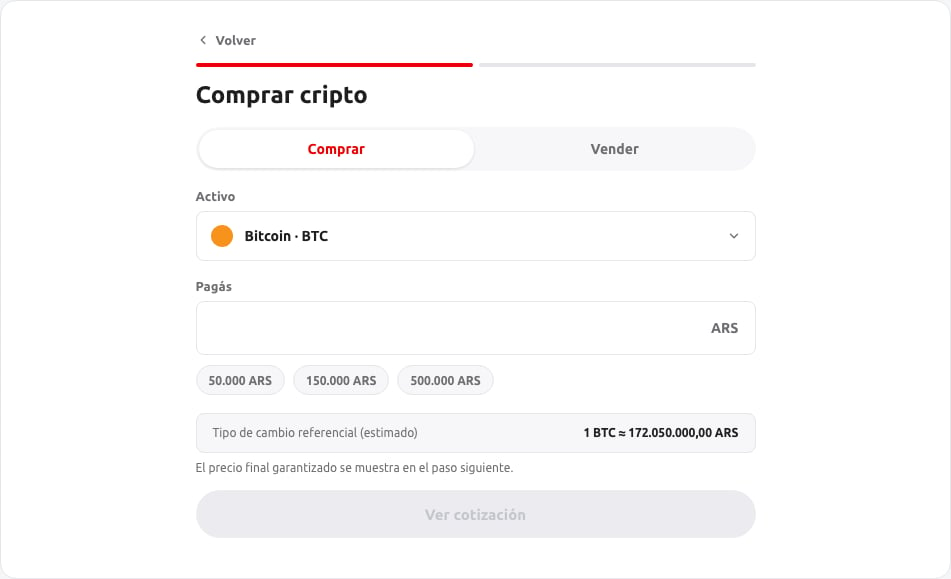
2
Quote
The widget requests a quote and shows the guaranteed rate, the fee, and the amount the user will receive, together with a countdown. While it’s running, the rate holds.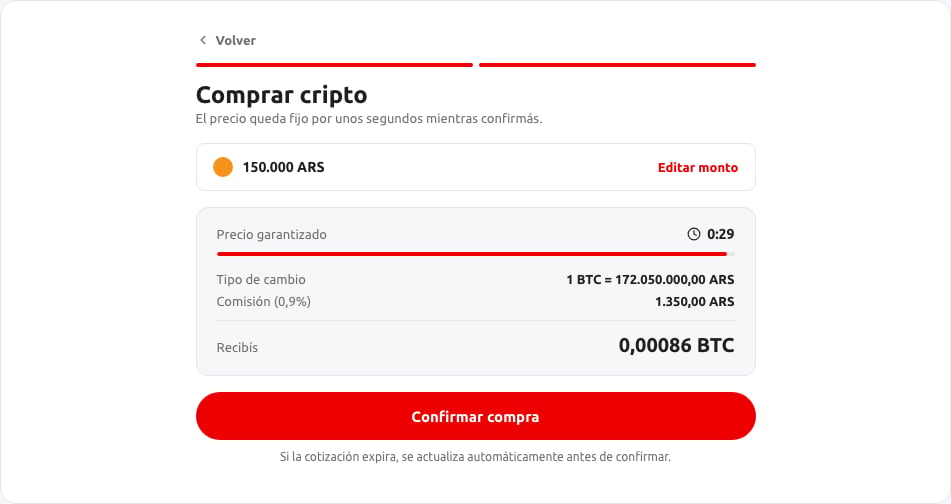
3
Result
Confirming shows a processing state, then either success — with a receipt the user can view — or an error with the option to retry.
Buy needs your approval
Before a buy executes, the widget asks your backend to approve it — the operation only goes through once you respond. See Webhooks for the request your endpoint receives and how to respond to it. A sell doesn’t need approval: Ripio holds the custody of the crypto being sold, so there’s nothing on your side to authorize before it executes. You still receive the result once it’s done.After the operation
Either way, your backend receives atransaction_result webhook once the operation resolves — successfully or not — so you can update your own records of the user’s balance. See Webhooks.
The operation also appears in the user’s Activity, where they can open it to see its detail and download a receipt.